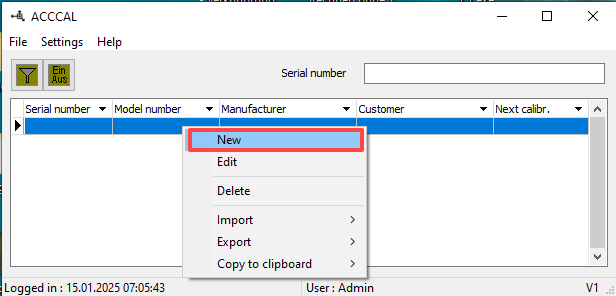
Now you need to create a new sensor. You will see a list of existing sensors in the main window. This is empty by default. Right-click with the mouse to open a context menu.

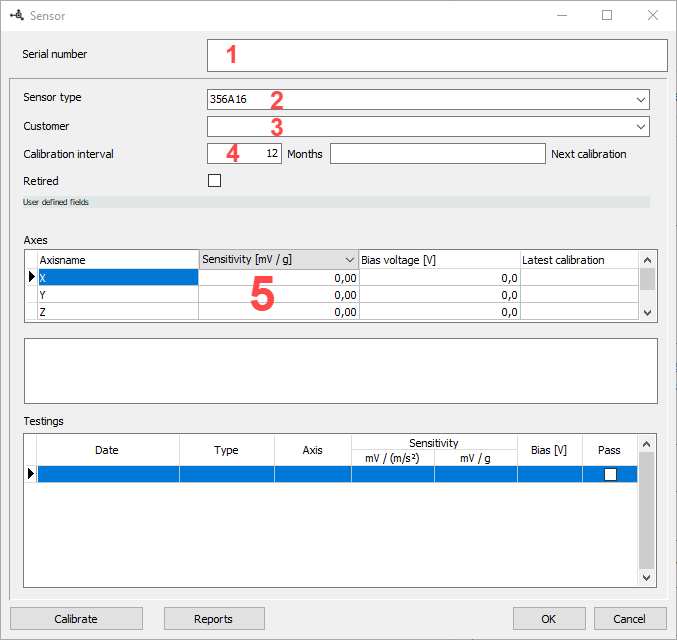
If you select New entry here, a dialog box appears in which you must enter the following information.

First enter the serial number [1] and the sensor type [2]. If the sensor type does not yet exist, it can be created via the context menu or via the main menu <Settings/Sensor types> (see: Creating a new sensor type). If you are calibrating on behalf of customers, the customer [3] can be selected or newly created (see: Creating a new customer). Under Calibration interval [4], enter how often the sensor should be calibrated. Depending on the sensor type, one or more axes appear in the axes list [5]. The sensitivity and bias voltage according to the manufacturer’s certificate can be entered here for the first time. These entries are always overwritten with the current calibration values. Under Testings, you will see all calibrations for the selected axis. Press the OK button or start with the first calibration immediately.
